After Fixing a Door Lock Actuator Will Keyless Entry Start Working Again
Automobile door lock actuators are designed to lock and unlock a door without the try of pulling on a cablevision and rod.
In some cars, the door lock actuator is positioned beneath the latch. A rod connects the actuator to the latch, and another rod connects the latch to the knob that sticks up out of the top of the door.
When the actuator moves the latch up, it connects the outside door handle to the opening mechanism. When the latch is down, the outside door handle is disconnected from the mechanism and then that it cannot be opened. This makes the outside handle move without moving the latch, preventing the door from opening.
The ability door lock actuator is a simple mechanical device. This organization is quite small in size. A small electric motor turns a serial of spur gears that serve as a gear reduction. The last gear drives a rack and pinion gear set that is continued to the actuator rod. The rack converts the rotational move of the motor into the linear motility needed to move the lock.
In that location are a number of ways that you can unlock car doors that have door lock actuators, including:
- Using a key
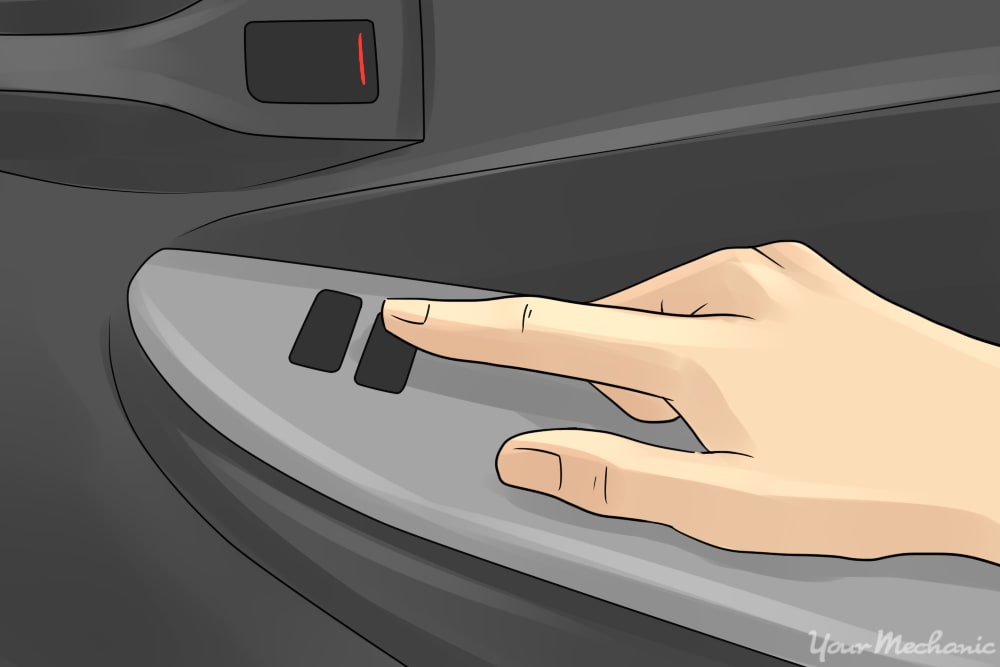
- Pressing the unlock button within the auto
- Using the combination lock on the exterior of the door
- Pulling upwardly the knob on the within of the door
- Using a keyless entry remote command
- Signaling from a command middle
At that place are two ways to decide if the actuator has failed:
- By operating a remote device or keypad to unlock the door
- By pressing on the unlock button on the door console cluster
If the door remains locked in either or both of these cases, the problem is the actuator.
At that place are several reasons why a door lock actuator may need to be replaced. Sometimes a door lock actuator stops working completely. In some cars, a door lock actuator becomes noisy and produces a squeaking or buzzing dissonance when the power door locks are locked or unlocked. If the electrical motor or the mechanism inside the door lock actuator wears out, the door lock may lock or unlock slowly or piece of work sometimes but not all the fourth dimension. In some cars, a failed door lock actuator may lock just won't unlock, or the other way around. In most cases, the trouble with a door lock actuator is express to but one door.
In some vehicles, the cable that connects the door lock actuator to the inner door handle may be built into the actuator assembly. If this cable breaks and information technology'southward not sold separately, the whole door lock actuator may need to be replaced.
Part 1 of 6: Verifying the condition of the door lock actuator
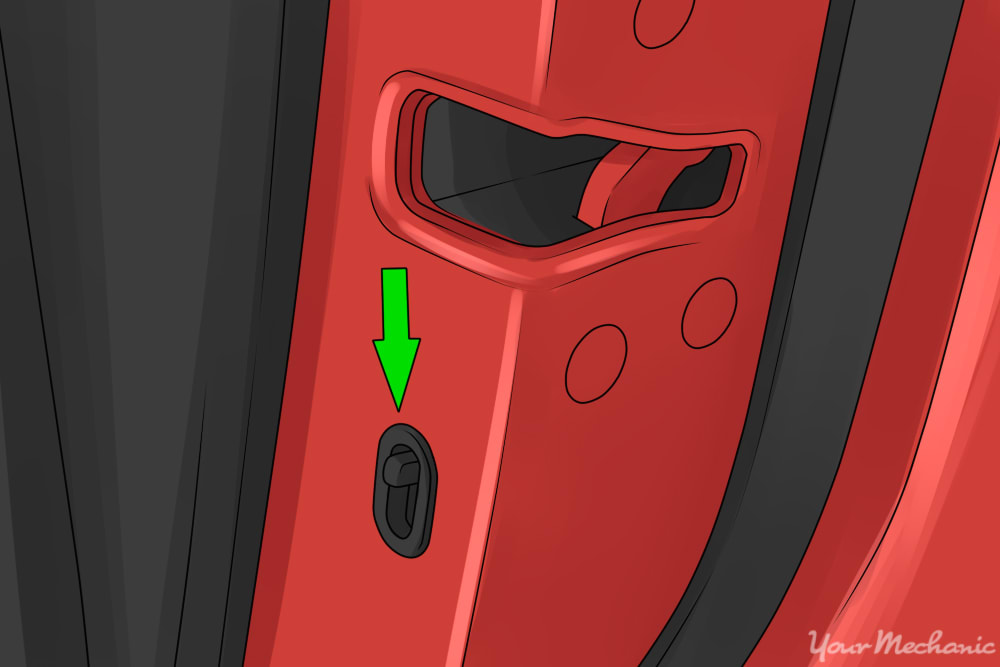
Footstep i: Inspect the affected door and lock. Locate the door with the damaged or broken door lock actuator. Visually look at the door lock for any exterior impairment. Gently lift upwardly on the door handle to encounter if there is any binding of the machinery within the door.
This checks to see if the actuator has frozen in a position that makes the handle seem as if it is jammed.
Stride ii: Open the affected door. Get into the vehicle from some other door if the door you are working on will not let you enter the vehicle. Open the door with the broken or damaged actuator from the inside of the vehicle.
Footstep 3: Dominion out the door lock. Try operating the door lock switch to rule out the idea that the door lock is non working. Then attempt to open the door from the inside of the vehicle.
Whether the door is locked or non, the door should open up from the within when operating the within door handle.
- Notation: If you are working on the rear doors of a iv-door sedan, keep the child safety locks in mind. If the kid safety lock is on, the door volition non open when operating the inside handle.
Part 2 of 6: Preparing to supersede the door lock actuator
Having all of the necessary tools and materials and preparing the vehicle prior to starting the piece of work will allow you to get the chore done more than efficiently.
Materials Needed
- 1000 grit sandpaper
- Boxed end wrenches
- Cross tip, or phillips head, screwdriver
- Electrical cleaner
- Flathead screwdriver
- Mineral spirits cleaner
- Needle olfactory organ plyers
- New door lock actuator
- 9-volt battery
- Ix-volt battery saver
- Ratchet with metric and standard sockets
- Razor bract
- Removal tool or pry tool
- Modest hammer
- Super glue
- Examination leads
- Torques bit set
- Wheel chocks
- White lithium
Stride one: Position the vehicle. Park your vehicle on a flat, difficult surface.
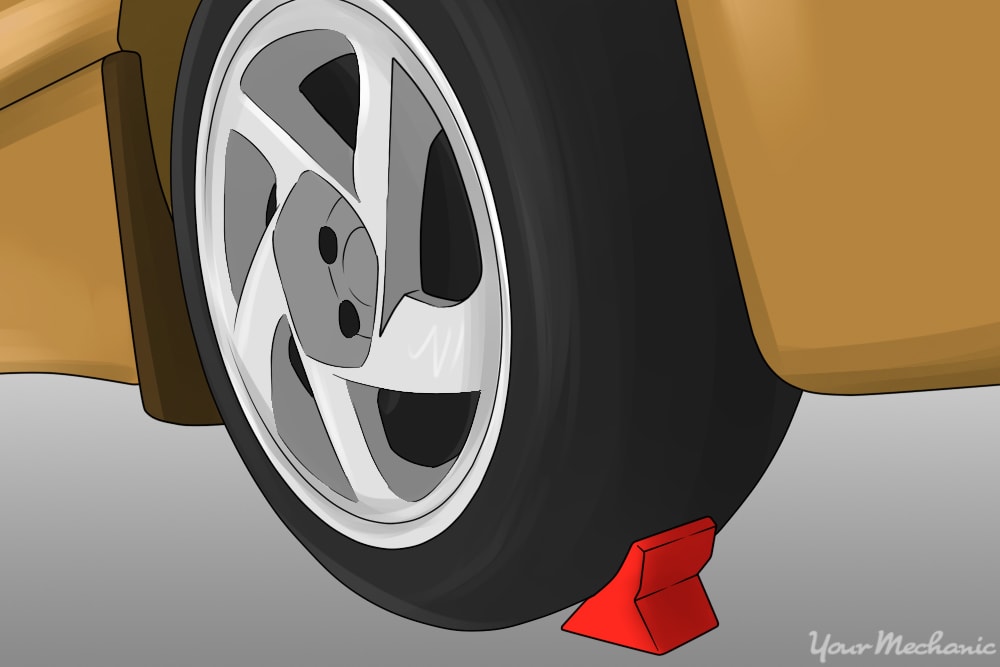
Stride 2: Secure the vehicle. Place wheel chocks effectually the tires. Engage the parking brake to the lock the tires and keep them from moving.

Footstep 3: Install a nine-volt bombardment saver. Plug the bombardment saver into your cigarette lighter. This will go along your figurer alive and go on your vehicle settings current. If you do not have a nine-volt battery saver, though, that's okay.

Step 4: Disconnect the battery. Open the vehicle'due south hood and locate the battery. Have the ground cablevision off of the bombardment'southward negative post, disabling the power to the door lock actuator.
- Note: If you lot take a hybrid vehicle, use the owner's manual for instructions on disconnecting the pocket-sized bombardment merely.
Part iii of 6: Removing the door lock actuator
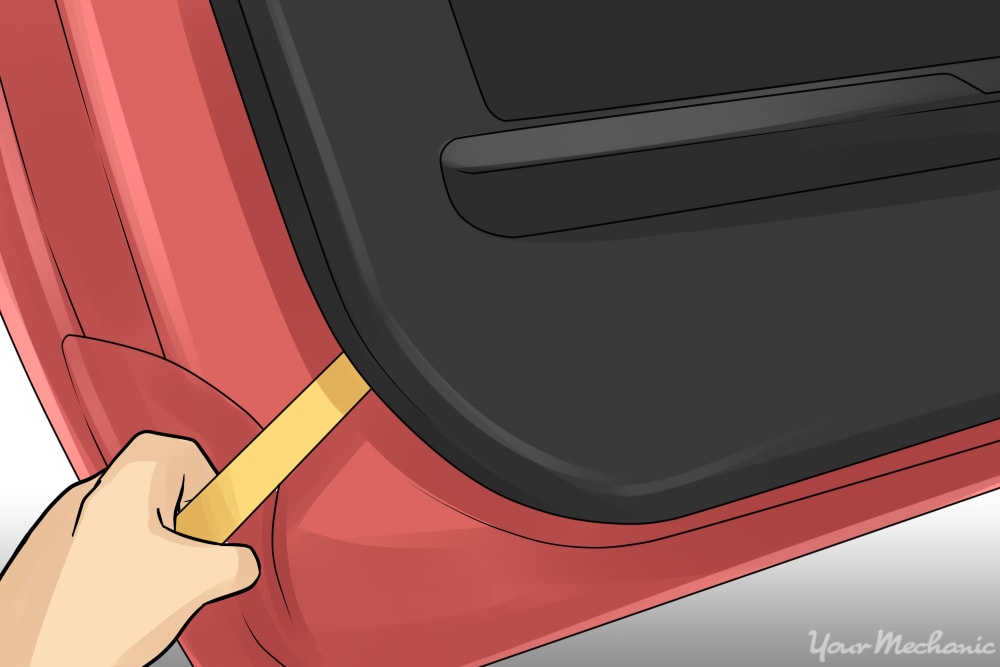
Step i: Remove the door panel. Start with removing the door panel from the afflicted door. Gently pry the panel away from the door all the way around. A flat screwdriver or removal tool (preferred) helps here, but exist gentle then you don't damage the painted door around the panel.
Once all the clips are loose, catch the panel pinnacle and bottom and bend it slightly away from the door. Lift the whole panel straight upwardly to clear information technology of the catch behind the door handle.
- Note: If your vehicle has electronic door locks, you will need to remove the door lock cluster console from the door panel. Before removing the door console, remove the screws attaching the cluster to the panel. If the cluster cannot be detached, you may be able to disconnect the harness connectors nether the door panel equally yous pull information technology off. If the vehicle has custom speakers that are externally mounted on the door console, these would need to be removed prior to removing the door panel equally well.
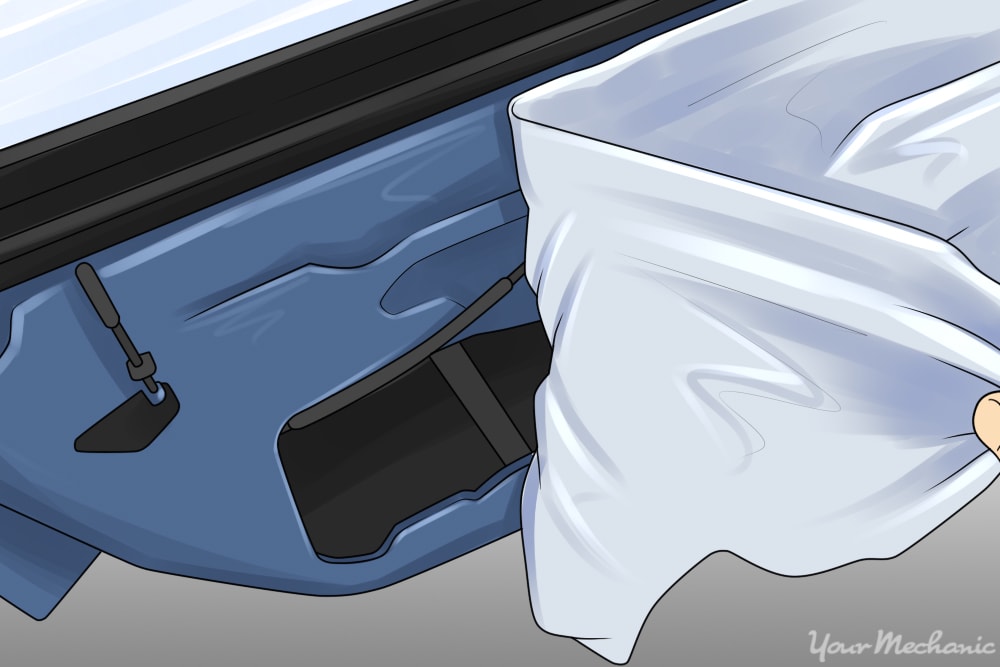
Step 2: Remove the plastic sheeting behind the panel. Peel back the plastic comprehend that sits backside the door panel. Do it gently and you'll be able to reseal the plastic after.
- Tip: This plastic is essential to forming a water barrier inside the door panel as some h2o e'er gets into the inside of the door during rainy days or a automobile wash. While you are at it, check that the two drain holes in the bottom of the door are articulate and there is no buildup of droppings at that place.
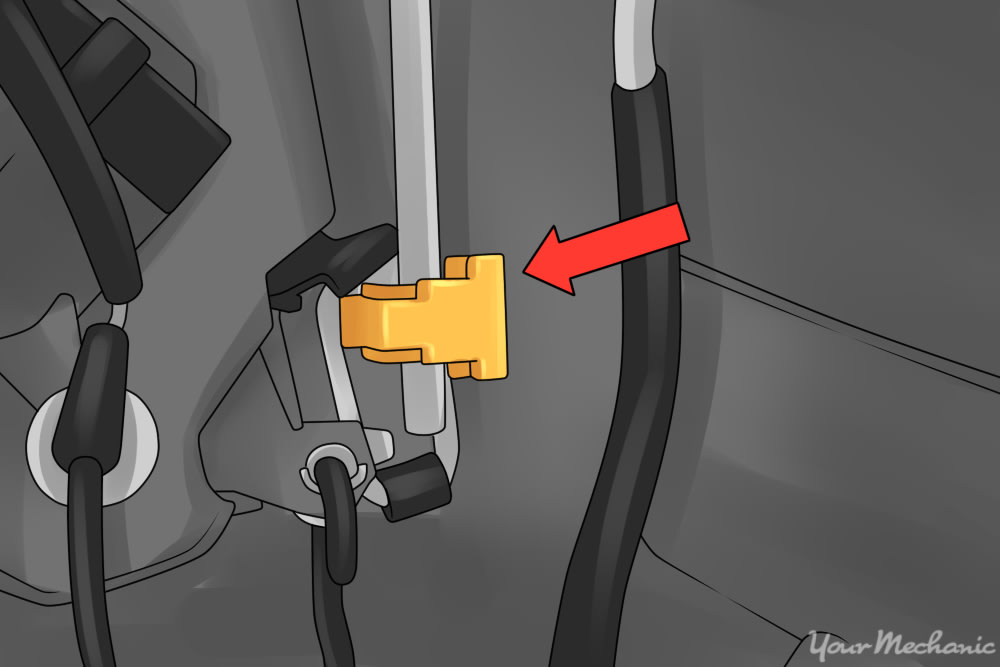
Step three: Locate and remove the clips and cables. Expect inside the door near the door handle and you lot'll see two metallic cables with yellow clips on them.
Pry off the clips. The top one pries up and out away from the door handle, and the lesser i pries up and toward yourself. So pull the cables out of the sockets.

Step 4: Remove the door lock actuator bolts and the lock screws. Detect the 2 10mm bolts in a higher place and below the actuator and remove them. Then remove the three screws from the door lock.

Step 5: Disconnect the door lock actuator. Let the actuator to drop down, then disconnect the black electrical connector.

Step half-dozen: Remove the lock and actuator assembly and take off the plastic embrace. Pull out the lock and actuator assembly forth with its cables.
Separate the white plastic cover that is held on by two screws, then separate the plastic door lock actuator that's held in identify by two screws.
- Tip: Go along in mind how the white plastic cover is mounted onto the lock and actuator assembly so that yous will be able to properly reassemble it afterwards.
Role 4 of 6: Repairing the door lock actuator
At this point, you volition brainstorm working on the door lock actuator. The idea hither is to pry the actuator open without damaging it. Since it is not a "serviceable part," the actuator housing is molded together at the factory. This is where you will need your razor blade, a pocket-size hammer, and some patience.
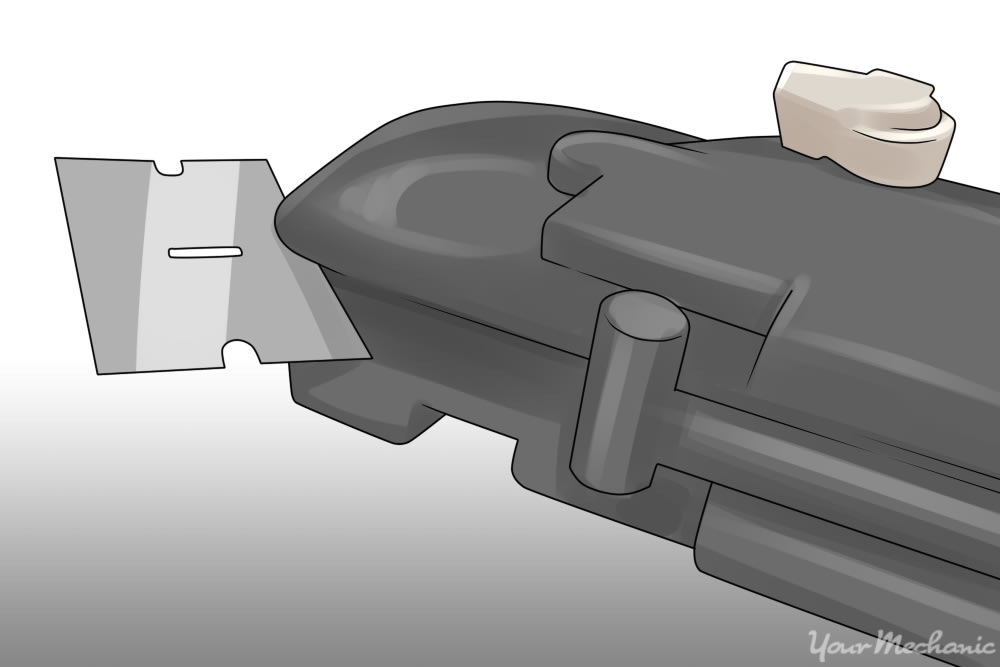
Step ane: Utilise a razor bract to open the actuator. Start on the corner by slicing your razor through the seam.
- Alert: Be very careful not to injure yourself with the precipitous razor blade.
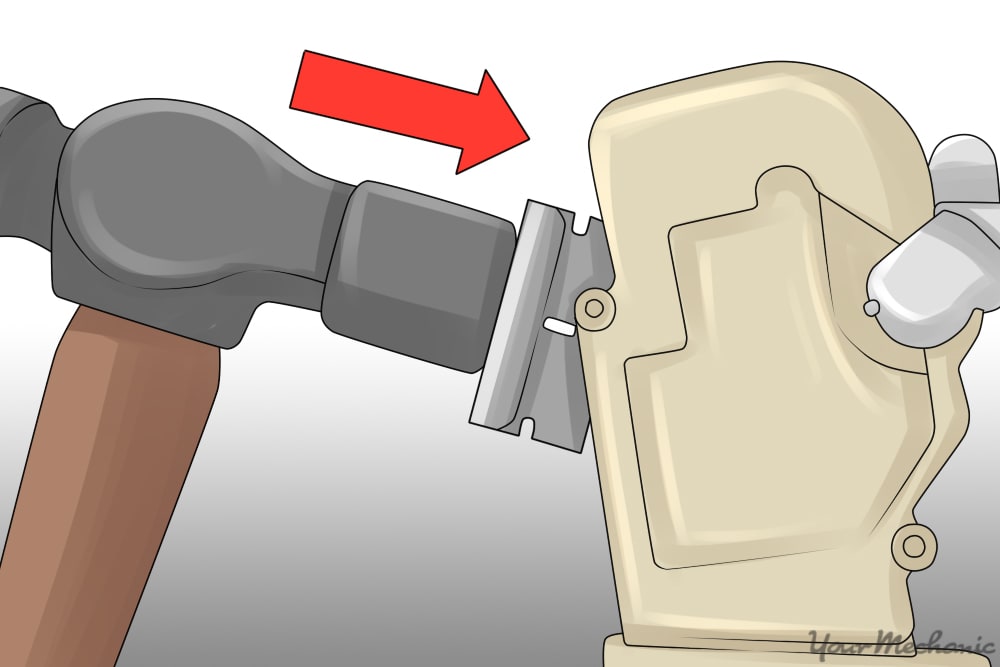
Position the actuator on a solid surface and tap the bract with the hammer until it gets in pretty deep. Keep going around the actuator to get as much of it separated by the razor as you lot tin can.

Carefully pry through the bottom portion next to the pivot housing.
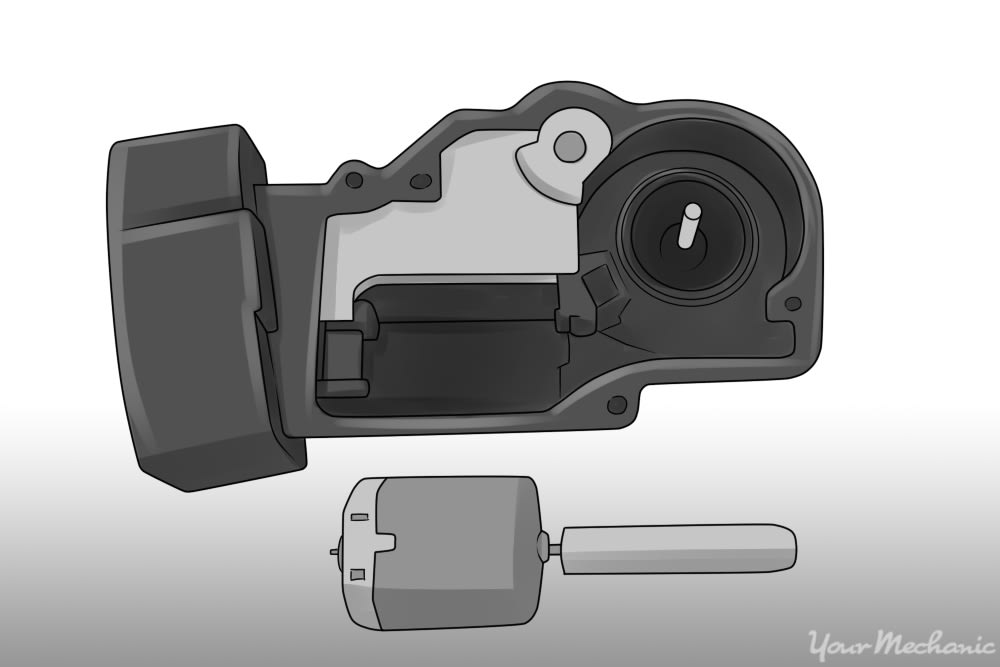
Step 2: Remove the electric motor from the actuator. Pry up on the gear and pull it out. So pry the motor up from its plastic portion and pull it out. The motor is not soldered in, and so there are no wires to worry about.
Remove the worm gear and its bearing from the plastic housing.
- Note: Take notes on how the bearing is installed into the housing. The bearing must get back in the same way.
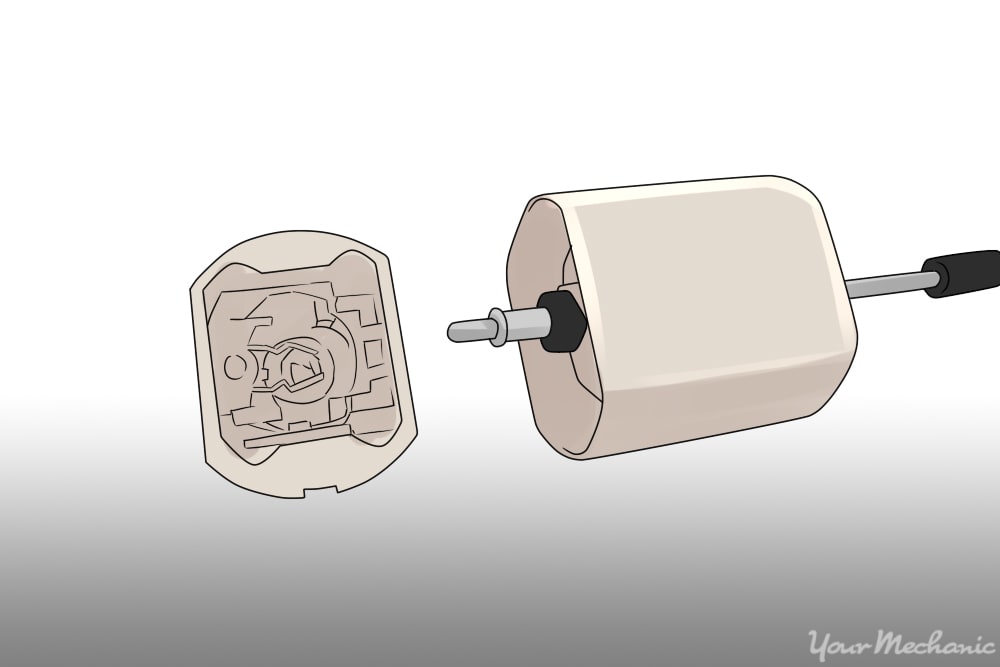
Stride 3: Take autonomously the motor. Using a sharp pry tool, pry out the metal tabs that hold the plastic backing in place. Then very carefully pull the plastic portion out of the metal housing, taking caution non to impairment the brushes.
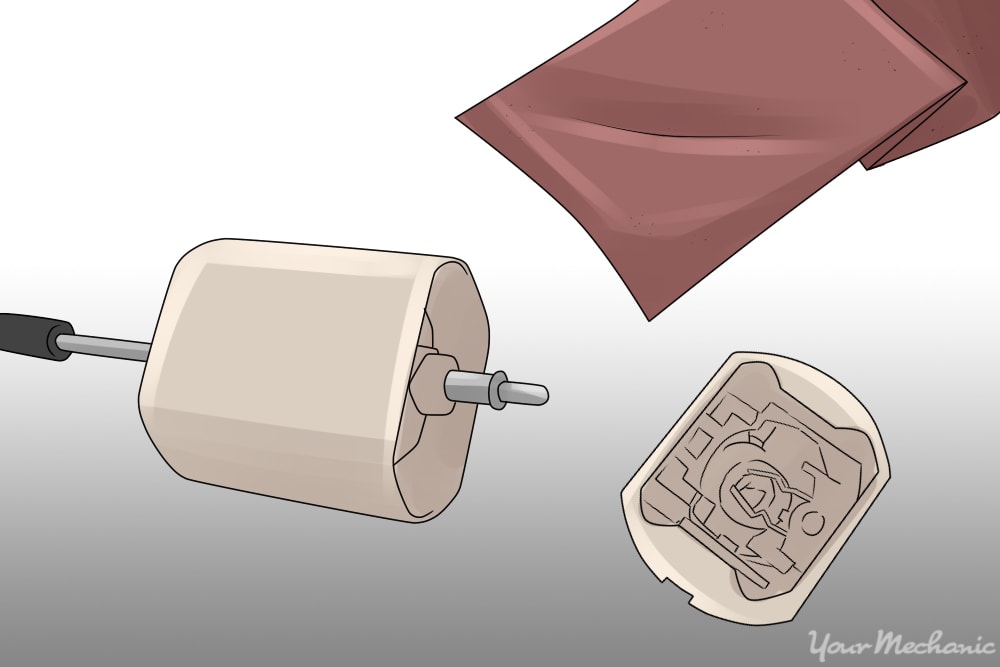
Pace 4: Clean and reassemble the motor. Apply electric parts cleaner to spray off old grease that has built upwardly on the brushes. Utilize one thousand dust sandpaper to clean upward the copper drum on the scroll shaft.
Put a pocket-sized amount of white lithium on the copper parts and reassemble the motor. This cleans up the electrical contacts for a proper connection.
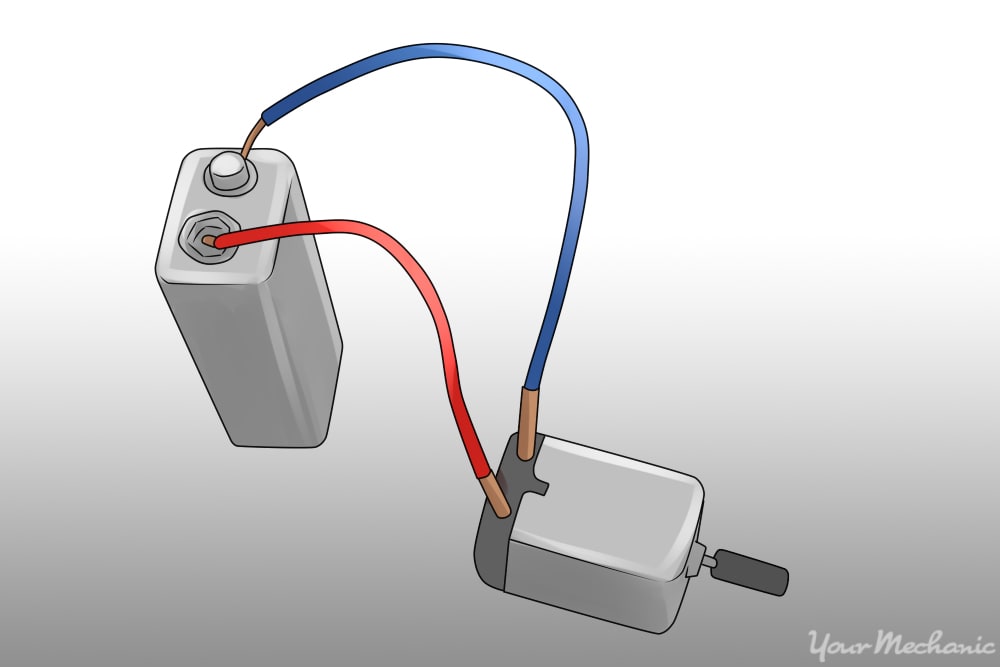
Step 5: Test the motor. Place your test leads on the motor contact points and connect the leads to a nine-volt battery to bank check the motor operation.
- Warning: Do not connect the motor to the battery for longer than a few seconds equally these motors are not designed for that.
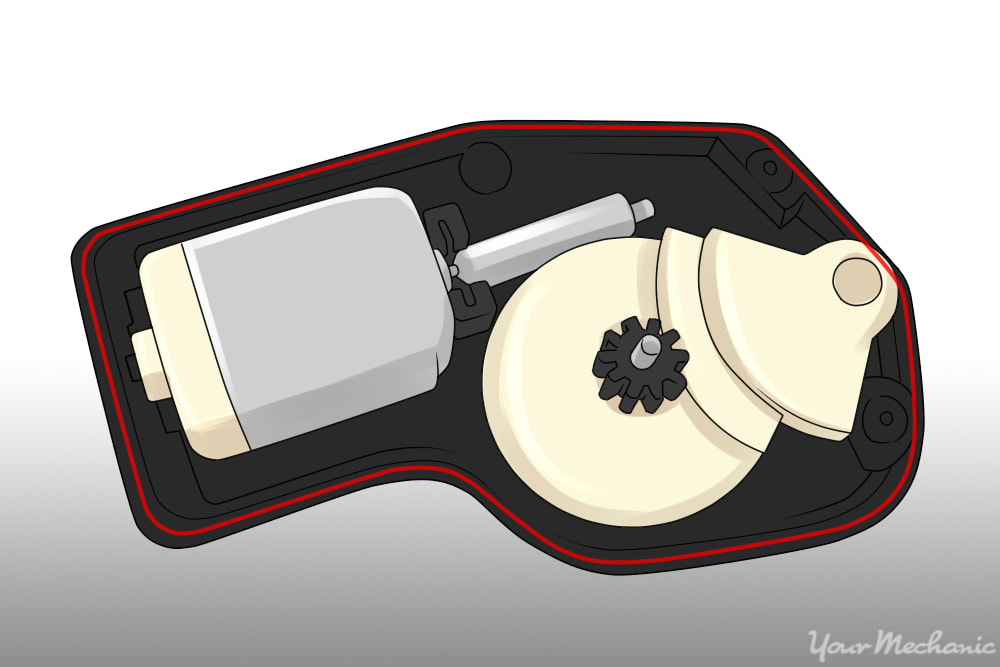
Step half dozen: Reinstall the motor and gears. Place the parts in reverse order from that in which you took them out.
Apply super glue to the cover and join the cover and housing back together. Hold them together until the glue bonds.
Function v of vi: Reinstalling the door lock actuator
Step one: Reinstall the plastic cover and replace the associates. Adhere the plastic door lock actuator back onto the assembly with 2 screws. Install the white plastic embrace back onto the lock and actuator associates by securing it with the two other screws you removed previously.
Place the lock and actuator assembly, with the cables attached, back into the door.
Step 2: Clean and reconnect the actuator. Spray electrical cleaner onto the black electric connector. After it dries, reconnect the blackness electric connector to the door lock actuator.
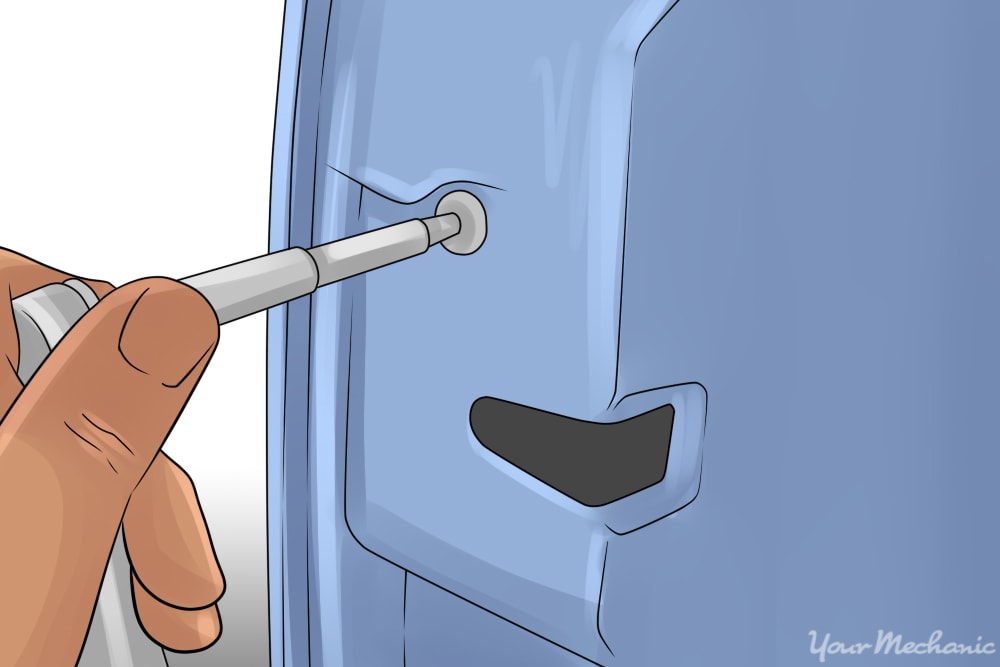
Step 3: Replace the door lock actuator bolts and screws. Reinstall the 3 screws into the door lock to secure information technology in the door. Then reinstall the two 10mm bolts above and beneath the location of the door lock actuator to secure the actuator.
Step iv: Reattach the clips and cables. Reconnect the metallic cables nigh the door handle by connecting the yellow clips back onto the sockets.
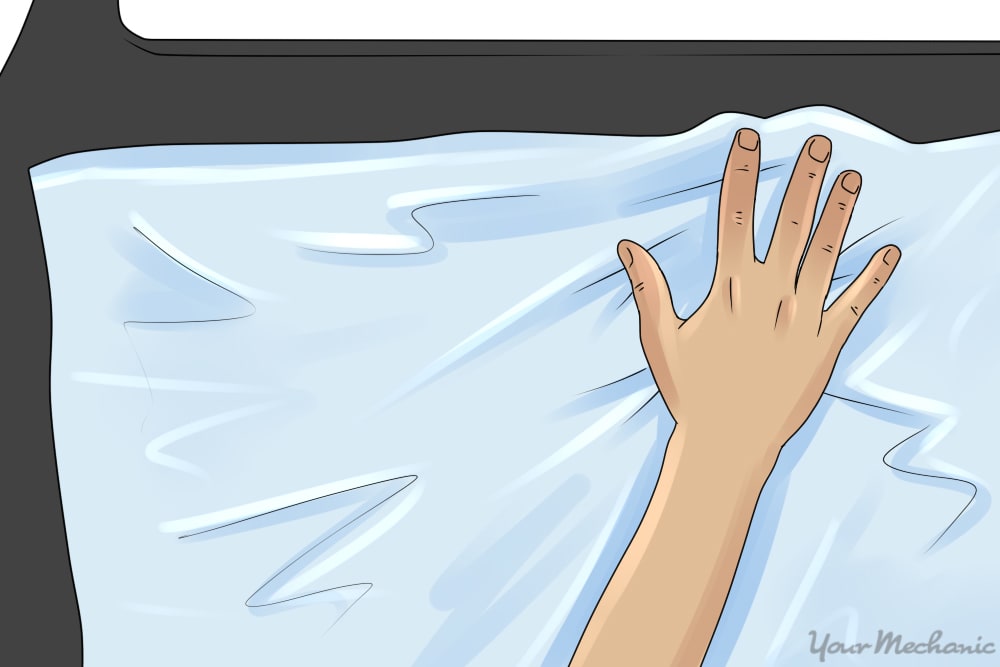
Footstep v: Reinstall the clear plastic sheeting. Put the plastic cover that goes behind the door panel back into place and reseal it.

Step half-dozen: Replace the door console. Put the door panel back onto the door and reattach all of the tabs by lightly snapping them into identify.
- Note: If your vehicle has electronic door locks, y'all volition need to reinstall the door lock cluster panel back into the door panel. Later replacing the door panel, reinstall the cluster into the panel with screws. Make sure the cluster is connected to the wiring harness. You may have to adhere the connectors under the door console before you fully reinstall the panel into the door. If the vehicle has custom speakers that are externally mounted on the door panel, these would need to be reinstalled back onto it after replacing the panel as well.
Part 6 of 6: Reconnecting the battery and testing the door lock actuator
Step 1: Supersede the battery cable and remove the battery saver. Open up the vehicle's hood and reconnect the basis cable dorsum onto the bombardment'south negative mail service. Tighten the battery clench upwards tight to ensure that the connection is good.
And so unplug the nine-volt bombardment saver from the cigarette lighter.
- Annotation: If you did not have a nine-volt battery saver, you will have to reset all of the settings in your vehicle, like your radio, electric seats, electrical mirrors, and then on.
Stride 2: Test the repaired door lock actuator. Pull on the outside door handle and ensure that the door opens from the latched position. Shut the door and go inside the vehicle through another door. Pull on the inside door handle and ensure that the door opens from the latched position. This ensures that the door will open with the door unlocked.
Sitting in the automobile with the doors close, printing on the locking switch of the affected door lock actuator. Then operate the within door handle and open the door. If the door lock actuator is operating correctly, opening the interior door handle will override the door lock actuator.
- Notation: If you are working on the rear doors of a four-door sedan, make sure that you plow off the kid prophylactic lock to test the repaired door lock actuator correctly.
While standing outside of the vehicle, shut the door and lock information technology with your electronic device only. Operate the outside door handle and to ensure that the door is locked. Unlock the door with the electronic device and operate the outside door handle again. This time, the door should open.
If your car door lock still does non function properly later repairing the door lock actuator, then at that place may be further diagnosis of the door lock and actuator assembly or a possible electronic component failure. You can always Ask a Mechanic to get quick, detailed advice from i of the certified technicians hither at YourMechanic.
You lot may need to fully supercede the actuator. If you would rather a professional perform this job, you tin have one of our qualified mechanics come and replace your door lock actuator for you.
The statements expressed above are simply for advisory purposes and should exist independently verified. Please run across our terms of service for more details
Source: https://www.yourmechanic.com/article/how-to-repair-a-door-lock-actuator-by-marvin-sunderland
0 Response to "After Fixing a Door Lock Actuator Will Keyless Entry Start Working Again"
Postar um comentário